This article originally appeared on The Trek, which you can read here.
Once I had decided to embark on my first thru-hike on the Appalachian Trail in 2021, I dove headfirst into all things trail in the months leading up to my start date. I had very little backpacking experience, and based most of my gear selection on reviews and my meager funds. I bought what I thought I needed, but learned within the first few days on trail that I had no idea what I was truly getting into.
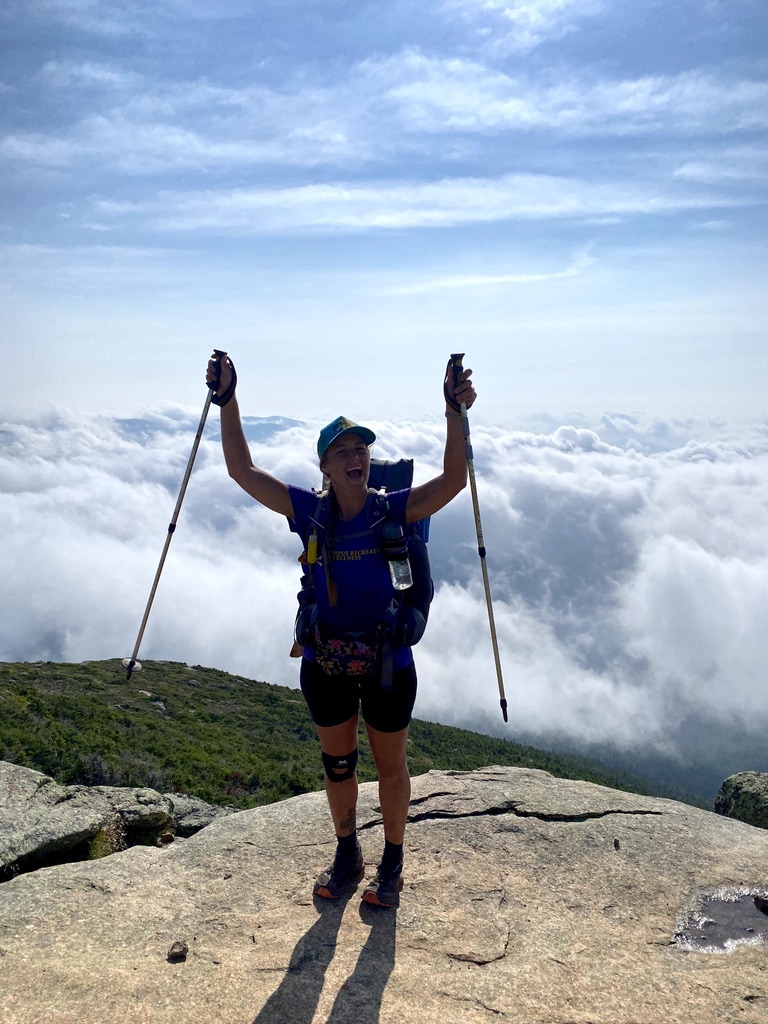
Now, years later, I have experience on my side when I pack for a backpacking trip. After completing the AT, I worked for three seasons as a backpacking guide in Great Smoky Mountains National Park. I hiked 500 miles of the Arizona Trail in 2023 and did the West Highland Way in 2024. In 2025, I suited up for another extended trek and walked from Mexico to Canada on the PCT.
My LighterPack on the AT compared to the PCT looked vastly different. With more miles under my belt, I can look back at my AT gear list with a more analytical eye. A lot has changed in 5 years, and now every piece of gear I carry has been meticulously tested and selected with care rather than just purchasing what I can afford.
Everyone has to start somewhere, but if I was starting over, here’s a breakdown of what I did and what I’d do differently with my gear.
Read Next: The Surprising Ways My Gear Changed From the AT to the PCT
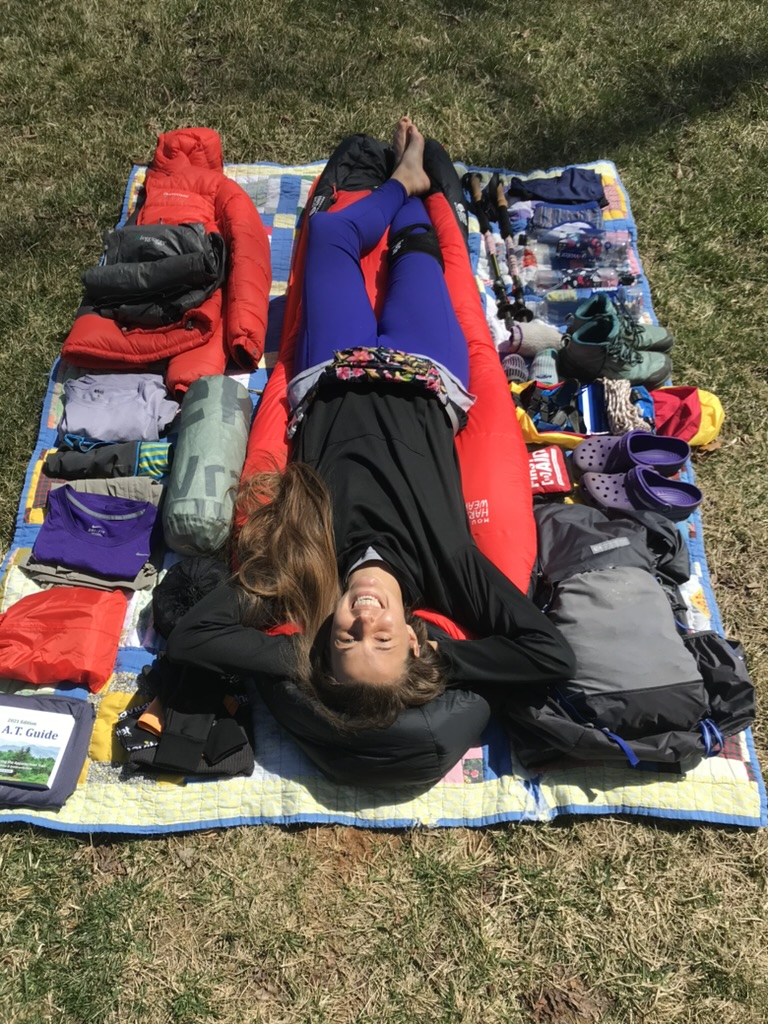
The Big Three
Despite my lack of knowledge and experience at the start of the AT, I had researched enough to know that I needed to dedicate most of my budget to the big three: pack, shelter, and sleep system (sleeping bag and sleeping pad). These were the things that were going to keep me safe, warm, and dry on my 2,200-mile trek. Some other items are optional, but the big three are non-negotiable. Every hiker, no matter how weight-conscious and ultralight, will have some form of a pack, shelter, and sleep system.
Sleeping Bag/Quilt
What I Used: Assorted synthetic sleeping bags
What I’d Do Differently: Invest in a down quilt
I planned to start with a 20-degree bag, but after one cold shakedown hike, I panicked and bought the cheapest 0-degree bag I could find. It was bulky, heavy, and I still wasn’t convinced it would be warm enough, so I added a liner for good measure.
I knew that my 0-degree bag wasn’t appropriate for the entire trail, so I cycled through three different sleeping bags depending on the season. The logistics of mailing sleeping bags up the trail was a headache, and these issues could have been resolved if I had just spent more money up front and bought a quilt.
Down quilts come with a steep price tag, but I believe they are worth every penny. They are lighter and make it easy to adjust airflow. I prefer down to synthetic material because it is lighter and keeps me warmer, the only downside being that I have to be extremely wary of the down getting wet.
Read Next: The Ultimate Guide to Backpacking Sleeping Bags and Quilts for All Budgets
Looking back at my rotation of sleeping bags on the AT, I regret not pulling the trigger sooner on purchasing a quilt. I purchased a 10-degree Enlightened Equipment Enigma in 2022 and have used it on every backpacking trip since.
This is another piece of equipment that hurts your wallet to purchase, but is absolutely worth it in the long run. With proper care, you can make your sleep system last for thousands of miles.
Sleeping Pad
What I Used: Therm-a-Rest Trail ProLite
What I’d Do Differently: Buy a thicker inflatable pad with a higher R-value
I started the AT thinking my sleeping pad didn’t matter, and assumed I would be so tired that I would fall asleep instantly, no matter what. I was wrong. My super-thin Therm-a-Rest Trail ProLite was a nightmare for a side sleeper like me. After talking with other thru-hikers, I realized that getting good sleep in the backcountry was possible with the right gear.
I splurged in Hot Springs, NC, on a Nemo Tensor and have used similar models since then. I love that this pad is extra thick so that I can comfortably sleep on my side without feeling like my hip or shoulder is resting on the ground. Other brands offer similar lofty pads, like the Therm-A-Rest NeoAir XLite NXT or the EXPED Ultra 3R.
My only regret here is not prioritizing comfort sooner. You can push through a lot on trail, but poor sleep catches up with you quickly. It’s also important to note the R-value and ensure it is appropriate for the temperatures you’re likely to encounter. The higher the R-value the warmer you will be.
Super hardcore ultralight hiker may opt for only using a closed-cell foam pad for weight savings. I just can’t get comfortable on those, but again, that knowledge comes from experience and trial and error.
Liner
What I Used: Sea to Summit Reactor Fleece
What I’d Do Differently: Question whether or not the weight of a liner is worth it …
I carry a liner for added warmth and cleanliness. On the AT, I used the Sea to Summit Reactor Fleece, and on the PCT I switched to the Reactor Extreme. The weight difference was minimal, and the switch mainly came down to wear and tear.
I think I am in the minority for carrying a liner. I have friends who use a silk liner to keep the inside of their quilts clean and to help with the longevity of their quilt. I like the added warmth, but for many, it isn’t worth the weight.
I don’t regret carrying a liner; it’s completely a personal preference. In warmer months, I leave my liner at home, but when temperatures are expected to be low, the additional warmth is worth it to me.
Pack
What I Used: Gossamer Gear Mariposa
What I’d Do Differently: Nothing! This pack worked great for me.
When deciding on a backpack, I didn’t know to compare volume, weight, carrying capacity, material, or other key features. I based my entire selection on the fact that two hikers I idolize used the pack.
I was a dedicated follower of Trek vlogger Julia “Rocket” Sheehan during her 2019 AT thru-hike. She used a Gossamer Gear Mariposa, and that was my first introduction to this pack. I was also a huge fan of Jennifer Pharr Davis, and at the time, she had just opened a guiding company. On their overnight trip, Pharr outfitted her guests in Mariposas. I rationalized that if these two women, whom I admired, used this pack, it must mean it was a good choice.
Paying $270 in 2021 for a pack (now $315 in 2026) was a tough pill to swallow, but I’m so glad I did. I fell in love with this pack and have used this model on every thru-hike since. Despite the price tag, I think it’s a great beginner-friendly pack that continues to hold up over time. The padding helps it ride comfortably, the frame gives it structure without it having to be packed perfectly, and the deep pockets easily hold all my bits and bobs.
Packs are going to continue to get smaller, lighter, and sleeker, but there’s a reason the Mariposa is consistently ranked among the best backpacks for thru-hiking. I would choose the Mariposa again and again, so I have no regrets in this area.
Read Next: The Best Backpacking Packs for Thru-Hiking in 2026
Shelter
What I Used: Tarptent Rainbow
What I’d Do Differently: Optionally invest in the lightweight version (Rainbow Li), but I have no regrets about the OG Rainbow
The most expensive and arguably one of the most important purchases prior to a thru-hike will be your shelter. Are you a hammock camper or ground dweller? Do you want a cozy cocoon in a 1-person tent, or do you need extra space in a 2-person tent? Do you want a free-standing tent or one that relies on stakes/trekking poles for weight savings? Do you want a single-wall tent for weight savings, or do you want the breathability of a double-walled tent?
Read Next: How to Choose a Tent for Thru-Hiking
Again, I had no idea what I wanted when I began looking at shelters. I didn’t even know hammock camping was a thing, so that meant I looked solely at tents. JDP’s guiding company used Tarptent, and a friend chose the Double Rainbow Li to take on the AT. To me, that meant that these tents would be great, and I invested in a Tarptent Rainbow. The price tag for the DCF version made me stick to the base silpoly model with the cheaper aluminium poles.
I lucked out on this blind purchase because it was a great choice! I still use this tent to this day if I’m by myself. It feels big enough to comfortably fit inside without being claustrophobic, and I liked having the additional liner to cut back on the condensation that’s typical in a single-walled tent.
It is heavier than other options on the market, but its durability has made it a worthwhile investment. For a higher price, you could get the lighter Dyneema version and the carbon fiber poles. However, I have no regrets in this area, and would recommend this tent to anyone.
Clothing
What I Used: Cheap “atheltic” clothing I already had
What I’d Do Differently: Invest in lightweight, moisture-wicking layers
On the AT, the only thing clothing advice I received was “cotton kills”. I knew I wanted to wear mostly synthetic clothing and opted for more moisture-wicking/quick-drying items. Again, I didn’t want to spend a ton of money, so I wore a cheap Nike Dri-FIT shirt from college and Walmart biker shorts.
I did invest in synthetic hiking bars/underwear and went with Exofficio because it’s what a friend recommended. I had a vague grasp on layering and found an inexpensive pullover from Goodwill to use as a midlayer, and felt like I hit the jackpot when I found a down puffy jacket on Facebook Marketplace. I wore REI baselayers to sleep in, and carried cheap Frog Toggs for rain gear.
I wish my clothing list stopped there, but at the beginning of the AT, I carried a lot of extra clothes “just in case”. This is one of the most common mistakes I saw from clients when working as a backpacking guide. The thought of wearing the same dirty, smelly clothing every day is inconceivable to most, but it’s the reality on long trails. Thankfully, my tramily convinced me to ditch the extra clothes early on, and my pack lightened significantly.
My regret in this area is not spending more money up front to invest in lightweight and durable clothing. You can get from point A to point B in just about anything, but better quality clothing will last longer and help to regulate your body temperature based on fabric type.
Read Next: Gear Wars: Merino Wool vs. Synthetic Base Layers
Electronics
What I Used: The least expensive things I could buy
What I’d Do Differently: Spend the money and get better quality
Just like with the rest of my gear, I didn’t have a ton of money to sink into “luxury items” at the start of the AT. I would argue that things like a power bank are no longer considered luxury items if you rely on your phone for FarOut navigation or a rechargeable headlamp.
I started with a cheap battery bank from Walmart and a headlamp that used batteries. I didn’t carry a GPS and used wired headphones. Down the trail, I bought a larger used power bank from another hiker, but the rest of my electronics made it the entire trail.
Read Next: The Ultimate Guide to Thru-Hiking Electronics
These days, I prefer to carry a Garmin inReach for peace of mind, I like the higher strength lumens that nicer headlamps provide, and I prefer Bluetooth headphones so that my headphone wires don’t constantly get tangled up. Midway through the PCT, I did upgrade to a larger battery bank and fast charging block to compensate for longer hauls between towns in the Sierra.
Again, none of these upgrades were necessary, but they have made things simpler and more effective in the long run. I don’t regret starting simple, but I do appreciate the upgrades now.
Trekking Poles
What I Used: Cheap Walmart trekking poles
What I’d Do Differently: Nothing — these served their purpose and were budget-friendly
It’s easy to get stuck in the weeds when it comes to researching equipment, and brands are constantly coming out with new “latest and greatest” products. Trekking poles, like any other piece of gear, can get expensive quickly, and that’s why I hiked with the cheapest pair I could find from Walmart. My cheap poles did the trick and lasted all the way from Georgia to Maine! They may have been heavier than aluminum or carbon poles, and the plastic handles weren’t as comfortable as foam or cork, but they got the job done.
This is an area where it’s easy to cut costs, and for that reason, I don’t have any regrets. I now carry carbon trekking poles and replace the tips regularly to keep them fresh, but it isn’t necessary to be successful on a thru-hike.
Cook System
What I Used: Clunky pot, frying pan, cutlery set, and heavy stove
What I’d Do Differently: Invest in a titanium pot, single utensil, and lightweight stove
My cook system was just what I had at the start of the trail. I had a cheap setup that consisted of a heavy pot, pan, full cutlery set, and large stove, plus a 20L thick plastic dry bag I used as my food bag. Early into the trail, I was convinced to downsize to a single pot and long-handled spoon. Over time, I’ve invested in a titanium pot and lightweight stove. I found a lightweight drybag in a hiker box and got rid of my oversized bag. Many UL hikers ditch their stoves completely and cold soak their meals to save weight, but I’m not that hardcore.
If I had to do it over again, I’d buy the lighter-weight stuff up front. The weight savings were significant, in addition to the space savings in my pack.
Water System
What I Used: Sawyer Mini and Sawyer dirty water bag
What I’d Do Differently: Use a larger filter and buy a large mouth dirty water bag
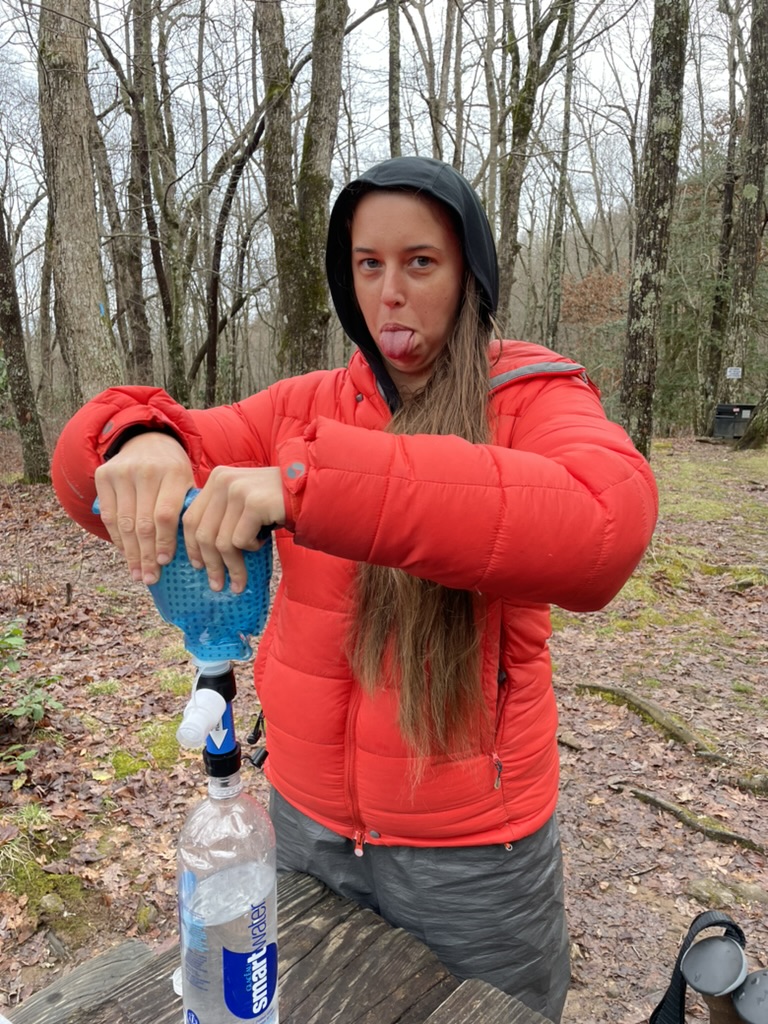
I wasn’t very weight-conscious before the AT, but one weight-saving item I purchased was the small Sawyer Mini. It wasn’t until I was actually on trail and saw my filter’s flow rate compared to my friends’ Sawyer Squeeze and Katadyn BeFree filters that I knew I needed to make a change.
While the standard bag works fine to collect dirty water to filter, the small opening makes collecting water a pain, especially if you have to scoop it from shallow pools. I was envious of my friends with the large mouth water bags like CNOC, and eventually upgraded to a Sqeeze+CNOC combo for the PCT. Many hikers prefer just to connect their filter to a water bottle and ditch the bag completely.
My biggest regret regarding my filter was starting with such a small filter and lugging around all the attachments. Hiker boxes will be filled with syringes to backflush, and the time savings of a slightly larger filter is worth its weight in gold.
Toiletries
What I Used: Makeshift med kit
What I’d Do Differently: Same thing!
Surprisingly, I had a decent idea of the kind of minimal toiletries I’d need on the AT. This was thanks largely in part to my friends and a shakedown hike. Many new hikers start with things like deodorant, shampoo, large tubes of sunscreen, and more bulky items. Less is more when it comes to toiletries, and you can always purchase items along the trail if you decide there’s something you can’t live without.
Read Next: 6 Essentials Every Backpacker Should Have in Their First Aid Kit, According to a Pharmacist
My toiletries/med kit on long trails these days consists of hand sanitizer, a travel-sized soap container (that doubles as soap/shampoo in town), Leukotape and a safety pin for blister management, Benadryl for allergies and sleep, and Ibuprofen/Tylenol for pain.
Depending on the season, I may also carry a travel-sized container or sunscreen, bug spray (and maybe a bug net). I’ve learned the hard way to also account for chafing, and will usually treat this with BodyGlide for prevention, or diaper rash cream.
Miscellaneous Gear
What I Used: AT Guidebook and paper journal
What I’d Do Differently: Save the weight and go digital
I lugged a full copy of the AWOL guide around in my pack all the way through Virginia. There I was finally convinced to send it home, since I’d been relying solely on FarOut for navigation since the start. I also carried a paper journal that I wrote in nightly, and that made it all the way to Kathadin. On the AZT and PCT, though, I ditched the journal and began journaling on my phone instead of writing it out on paper.
I regret not going fully digital earlier on. I love the feel of a book in my hands and think it’s therapeutic to write out my thoughts after a long day, but the weight savings and convenience of being fully digital outweigh the sentiment.
I also carried multiple carabiners at the start of the AT; I’m not sure why I was so convinced they’d be useful. Other hikers quickly convinced me to abandon them in hiker boxes, and my pack lightened the further from Springer I ventured.
Conclusion
Overall, many of my regrets came down to the fact that I didn’t want to spend the money on higher-quality gear. It’s taken years of slow and methodical purchases, but my kit is finally stacked with gear that’s lighter, more durable, and all around more functional than when I started.
Everyone has to start somewhere, and I still made it to Katahdin with my hodgepodge equipment. Gear truly is an investment, and you don’t know what you will and won’t like until you actually get out there and try it out. Experience is the best teacher, and preferences are established by actually testing things out.
What works for me may not work for you, but hopefully my experiences will at least give you a starting place to begin your own research and experimentation.

Leave a comment